Incubating your own chicken eggs is one of the most rewarding experiences a backyard enthusiast can tackle—but it also comes with a steep learning curve. Whether you’re aiming for a sustainable flock or just want to witness the miracle of life up close, this beginner’s checklist walks you through every step, from sourcing fertile eggs to raising healthy chicks. No fluff, just actionable advice.
Sourcing Fertile Eggs: The First Critical Step
Before you even plug in your incubator, you need eggs that are actually fertile. Not all eggs from the grocery store will work—they’re almost always unfertilized. Your best bet is a local farm, a trusted breeder, or a specialty hatchery. Fertility rates can vary dramatically depending on the rooster-to-hen ratio, age of the birds, and season. For example, a flock with one rooster per ten hens typically yields 80–95% fertility, while older roosters may drop to 50%.
How to Check Freshness Before Incubation
Fresh eggs hatch significantly better than stored ones. Ideally, incubate eggs that are less than 7 days old. After 10 days, viability drops sharply. Use the float test as a quick freshness check: place the egg gently in a bowl of water. A fresh egg lies flat on the bottom; a week-old egg tilts slightly; an egg that floats is too old for incubation and may have a compromised air cell. Do not use floating eggs—they often contain bacteria.
| Egg Age | Float Test Result | Hatchability |
|---|---|---|
| 1–3 days | Sinks, lies horizontally | Excellent (>90%) |
| 4–7 days | Sinks, tilts slightly | Good (75–90%) |
| 8–10 days | Sinks, stands on point | Fair (50–75%) |
| >10 days | Floats | Poor (<30%) |
Practical tip: If you pick up eggs from a local farm on a Saturday, mark the date with a pencil and aim to set them in the incubator by the following Wednesday or Thursday. Never wash eggs—the protective bloom is essential for preventing bacteria from entering the shell. If they’re dirty, gently dry-scrub with a fine sandpaper or a dry sponge.
Essential Equipment: Your Incubation Toolkit
You can’t hatch eggs without the right gear. The three non-negotiables are an incubator, a hygrometer, and a candler. Let’s break down each piece and what to look for.
Incubators: Still Air vs. Forced Air
Still-air incubators rely on natural convection and are cheaper, but they create temperature gradients—the top can be 2–4°F warmer than the bottom. Forced-air models (with a fan) maintain uniform temperature and are far more forgiving for beginners. I recommend a forced-air incubator with automatic turning, even if it costs a bit more. Brands like Brinsea or Hova-Bator are reliable. Always calibrate your incubator for 24 hours before adding eggs, using a separate thermometer (the built-in ones are often inaccurate).
Hygrometer and Candler
A hygrometer measures humidity—critical for proper air cell development. Digital hygrometers with a probe are cheap and accurate. Calibrate it using the salt test: wrap a wet paper towel in salt, place it in a sealed bag with the hygrometer for 8 hours; it should read 75%. Humidity during incubation (days 1–18) should be 40–50%; during lockdown (days 18–21), raise it to 65–75% to soften membranes and help chicks break free.
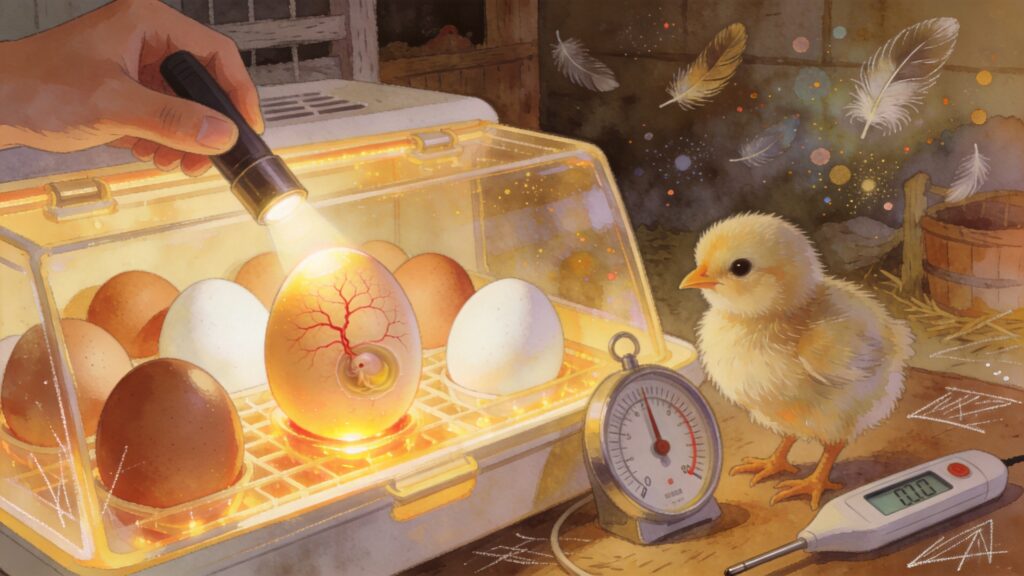
A candler lets you check embryo development without cracking the shell. You can buy a simple handheld candler for $15, or make your own with a bright LED flashlight and a small cardboard tube. Candle all eggs on day 7 and day 14 to remove infertiles and clears, which can rot and explode inside the incubator.
Step-by-Step Incubation Process
Once your equipment is ready and temperature stable at 99.5°F (forced air) or 102°F (still air), place the eggs pointed-end down in the incubator. For the first 18 days, you’ll need to turn eggs 3–5 times daily to prevent the embryo from sticking to the shell membrane. If your incubator doesn’t have automatic turning, mark an “X” on one side and an “O” on the other with a pencil—this helps you track which eggs you’ve turned.
Candling Schedule and What to Look For
On day 7, candle in a dark room: a fertile egg will show a network of blood vessels radiating from a dark spot (the embryo). Infertile eggs appear clear, and “blood ring” eggs (a ring of blood around the yolk) indicate early death—remove both. By day 14, the embryo should fill most of the egg except the air cell. A healthy air cell grows larger and more defined each week.
“I remember my first hatch—I was too scared to candle and lost four eggs to rot. Once I started candling on day 7 and 14, my hatch rate jumped from 60% to over 90%. Trust the light.” — Sarah M., backyard chicken keeper, Oregon
Here’s a quick day-by-day milestone list to keep you on track:
- Days 1–7: Temperature 99.5°F, humidity 45%, turn eggs 4x/day. Candle on day 7, remove clears and blood rings.
- Days 8–14: Same conditions. Candle again on day 14—you should see a large dark mass and a well-defined air cell.
- Days 15–18: Maintain humidity 45%, continue turning. Stop turning on day 18 (lockdown).
- Days 18–21: Increase humidity to 70%, stop turning and do not open the incubator. Wait for pip and zip.
A common beginner mistake is opening the incubator during lockdown out of impatience. Don’t do it. Each time you open the lid, humidity plummets and the membranes dry out, trapping chicks inside. Set a 21-day timer on your phone and resist the urge.
Hatching Day and Post-Hatch Care
On day 21 (or sometimes day 20 or 22), you’ll hear peeping and see a small crack—the “pip.” The chick will then rotate inside the shell, creating a “zip” line, and push itself out. This process can take 12–24 hours. Never help a chick hatch unless it has been pipped for over 24 hours and shows no progress—and then only if you know what you’re doing. Premature intervention can cause fatal bleeding.
Once hatched, leave chicks in the incubator for at least 12 hours until their fluff is completely dry. Then transfer them to a brooder—a small enclosure with a heat lamp, bedding (pine shavings or paper towels), chick starter feed, and a shallow waterer. The brooder temperature should start at 95°F for the first week, then decrease by 5°F each week until they are fully feathered (around 6–8 weeks).
Brooder Essentials Checklist
- Heat source: A 250-watt infrared heat lamp suspended 18–20 inches above the bedding.
- Bedding: Pine shavings (avoid cedar—it’s toxic). Replace daily to keep dry.
- Feeder: A small chick feeder filled with medicated or unmedicated starter crumbles (medicated helps prevent coccidiosis).
- Waterer: A shallow waterer with marbles or a small platform to prevent drowning. Add electrolyte powder for the first 3 days.
| Week | Brooder Temperature (°F) | Notes |
|---|---|---|
| 1 | 95 | Monitor chick behavior—huddling means too cold, panting means too hot. |
| 2 | 90 | Raise heat lamp slightly each week. |
| 3 | 85 | Start introducing small perches. |
| 4 | 80 | Gradually reduce heat; chicks begin to feather. |
| 5 | 75 | Can go outside during warm days (supervised). |
| 6+ | 70 (room temp) | Fully feathered—ready for coop if weather permits. |
Troubleshooting Common Issues
Even careful beginners run into snags. Here are the most frequent problems and how to solve them:
- Chicks die inside shell (no pip): Usually humidity too low during lockdown. Next time, ensure humidity stays above 65% and add water quickly if drops occur.
- Chicks pip but don’t zip: Membranes dry out from low humidity. Again, humidity is key. You can carefully moisten the eggshell with a damp Q-tip if needed, but don’t open the incubator for long.
- Malpositions (e.g., beak not under wing): Often from improper turning. Verify you’re turning at least 3 times a day until day 18.
- Rotten eggs exploding: Caused by bacteria entering through cracked shells or dirty eggs. Always discard cracked eggs before incubation, and don’t wash eggs.
Remember that a 75–85% hatch rate is excellent for a beginner. Don’t be discouraged by losses—learn from them. Keep a log of temperature, humidity, and candling results to refine your technique next time.
Final Words of Encouragement
Incubating eggs is part science, part art, and a whole lot of patience. You’ll make mistakes, but each failed hatch teaches you something valuable. Stick to the checklist, trust your equipment, and soon you’ll be watching fluffy chicks peep their way into the world. There’s nothing quite like it.