Introduction
Your chickens may have a clean coop, fresh water, and plenty of food, but tiny parasites can still find their way into your backyard flock.
Chicken mites and lice are common external parasites that can cause irritation, feather damage, restlessness, reduced egg production, and, in severe mite infestations, anemia or even death.
The tricky part? These parasites are small, sometimes difficult to spot, and can multiply before you realize there is a problem.
If your chickens are scratching excessively, losing feathers, looking pale, or refusing to settle comfortably at night, it may be time to inspect them more closely.
The good news is that many infestations can be managed with early detection, appropriate poultry treatments, and better coop hygiene.
This guide explains how to identify chicken mites and lice, distinguish between them, treat an infestation safely, and prevent these unwanted visitors from returning. 🐔
1. Understanding the Difference Between Chicken Mites and Lice
Chicken mites and lice are not the same parasite. Knowing the difference matters because their behavior and treatment approaches can vary.
Chicken mites
Mites are tiny arachnids related to ticks and spiders. Some species feed on chicken blood, while others spend much of their time in the coop environment.
The northern fowl mite lives and feeds on the bird, while the common red poultry mite typically hides in cracks, crevices, and nesting areas during the day and feeds on chickens at night.
Chicken lice
Chicken lice are insects that live on the bird and feed mainly on feathers, skin debris, and other organic material rather than blood.
They spend their entire life cycle on the chicken. Their eggs, often called nits, are attached to feather shafts.
This distinction is important: finding parasites on the bird does not automatically mean you are dealing with the same problem as finding tiny crawling pests in coop cracks.
2. How to Tell If Your Chickens Have Mites or Lice
External parasites can cause noticeable changes in your flock, but the signs are not always obvious at first.
Look for these warning signs:
- Frequent scratching or excessive preening.
- Restlessness, especially at night.
- Feather damage or unusual feather loss.
- Red, irritated, or crusty skin.
- Pale combs and wattles.
- Reduced egg production.
- Tiny moving insects around the feathers.
- White or yellowish egg clusters attached to feather shafts.
Heavy mite infestations can cause blood loss and anemia, particularly when birds are already weak or vulnerable. Lice can cause significant irritation and feather damage. Merck Veterinary Manual+1
Where Should You Look?
Pay particular attention to these areas:
- Around the vent: A common location for northern fowl mites and several poultry lice.
- Under the wings: Check the skin and feather bases.
- Around the breast and thighs: Part the feathers carefully.
- Near the tail: Look for moving parasites and attached eggs.
- Along the legs: Check for thickened, raised, or crusty scales that may indicate scaly-leg mites.
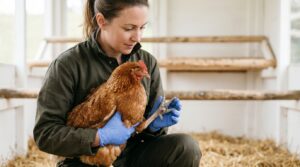
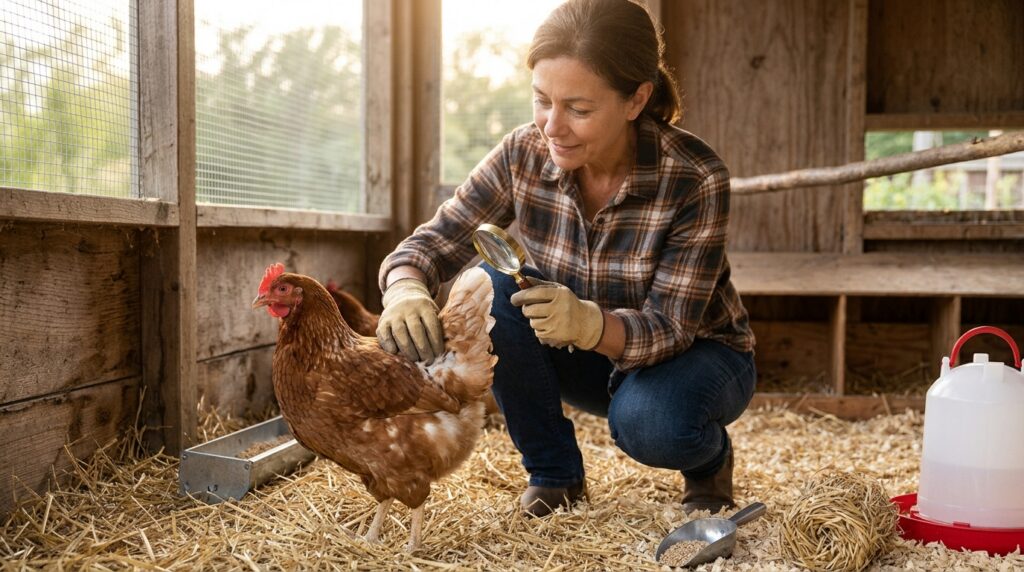
Use good lighting and gently part the feathers rather than relying on a quick visual inspection.
3. How to Identify Red Mites in the Chicken Coop
Red poultry mites are particularly troublesome because they do not spend all their time on chickens.
They typically hide during daylight hours and emerge at night to feed.
This means you might inspect your chickens during the day and find very few parasites, even when the coop is infested.
Check these hiding places:
- Undersides of roosting bars.
- Cracks in wooden perches.
- Nest box corners.
- Joints between walls and flooring.
- Gaps around screws and fittings.
- Areas beneath removable trays.
Look for tiny moving reddish, grayish, or dark specks.
A simple inspection technique is to wipe a white tissue along the underside of a perch or inside a suspected crack. Reddish smears may indicate crushed blood-fed mites, although this alone does not confirm the species.
Inspecting the coop after dark can also reveal mites moving onto the birds.
Red poultry mites are known to hide in environmental cracks and crevices during the day. MSD Veterinary Manual+1
4. How to Treat Chicken Mites and Lice
The correct treatment depends on the parasite species.
Treating lice and treating red poultry mites are not exactly the same.
Step 1: Inspect the Entire Flock
Check every chicken, not just the bird showing symptoms.
If several chickens share the same housing, they may have been exposed to the same parasites.
Record which birds show visible infestation, feather damage, or signs of illness.
Step 2: Choose a Poultry-Approved Treatment
Ask a poultry veterinarian or qualified agricultural professional about an appropriate product.
Depending on the location and product registration, treatments may include approved formulations containing:
- Permethrin.
- Pyrethrins.
- Spinosad.
- Other registered poultry antiparasitic products.
Not every product is approved for direct application to chickens.
Some products are intended only for empty coops or environmental treatment.
Important: Never use ordinary household insecticides, garden pesticides, dog flea treatments, or livestock products on chickens unless the label specifically permits that use.
Always follow the product’s instructions, including application method, protective equipment, repeat-treatment schedule, and egg or meat withdrawal requirements. Product registrations differ between countries. Mississippi State University Extension Service+2
Step 3: Treat the Coop Environment
For red poultry mites, treating the birds alone may not solve the infestation.
Remove contaminated bedding and clean the housing thoroughly.
Pay particular attention to:
- Roosting bars.
- Nest boxes.
- Wall joints.
- Wooden cracks.
- Corners and hidden spaces.
- Areas beneath feeders and drinkers.
If an approved environmental treatment is needed, apply it exactly as directed.
Keep chickens away from treated areas until the product label says they can safely return.
Step 4: Follow the Required Repeat-Treatment Schedule
One treatment may not eliminate every parasite or newly emerging generation.
Some parasites have life stages that are less susceptible to certain treatments.
For this reason, follow-up treatment may be necessary, depending on the product and parasite.
Do not automatically repeat a pesticide every few days. Follow the specific label schedule and ask a veterinarian if the infestation continues.
Step 5: Reinspect Your Chickens
Check treated birds again according to the product instructions.
Look for:
- Remaining live parasites.
- New egg clusters.
- Continued scratching.
- Feather damage.
- Pale combs.
- Changes in appetite and activity.
If parasites remain, consider whether the species was identified correctly, the treatment reached the appropriate areas, or the coop remains infested.
5. Can Diatomaceous Earth Help With Chicken Mites and Lice?
Diatomaceous earth (DE) is frequently discussed in backyard poultry communities.
It works physically by damaging the protective outer layer of certain insects and contributing to dehydration.
However, there are important limitations.
- It should not be considered a reliable standalone treatment for an established infestation.
- Dust can irritate the respiratory tract.
- Food-grade does not automatically mean safe to inhale.
- It does not replace an effective, species-appropriate treatment.
Avoid creating airborne dust around chickens or applying loose powder in ways that birds can inhale.
For serious infestations, use veterinary or agricultural guidance rather than relying on homemade dust treatments.
6. How to Prevent Mites and Lice From Returning
Prevention is often easier than dealing with an established infestation.
A consistent inspection and cleaning routine can help protect your flock.
Keep the Coop Clean and Dry
Remove wet bedding, accumulated droppings, and heavily soiled nesting material.
Good ventilation helps control moisture and improves the overall coop environment.
Provide Dust-Bathing Areas
Chickens naturally dust-bathe as part of their grooming behavior.
Provide a dry, sheltered area with suitable dust-bathing material.
Dust bathing supports normal grooming, although it should not be treated as a guaranteed parasite-control method.
Inspect New Chickens Before Introducing Them
New birds can introduce external parasites into an established flock.
Keep newcomers in a separate quarantine area for at least two weeks, and inspect them carefully before introducing them.
Use separate equipment during quarantine where practical.
Check Wild Bird Access
Wild birds and rodents can contribute to parasite introduction.
Reduce unnecessary contact by protecting feed storage, limiting access to nesting areas, and maintaining suitable coop barriers.
Inspect Perches and Nest Boxes Regularly
Make parasite inspections part of your normal cleaning routine.
Wooden joints and narrow cracks deserve particular attention because they can provide hiding places for red poultry mites.
These prevention measures are consistent with recommendations from poultry extension and veterinary resources. Business Queensland+1
7. Can Chicken Mites Affect Humans?
Some poultry mites, particularly red poultry mites, can bite people when they are present in an infested environment.
You may notice small, itchy red bumps after handling chickens or cleaning an infested coop.
However, poultry red mites cannot establish a reproducing infestation on humans.
If people in your household experience persistent bites, investigate the poultry housing and nearby bird nests.
Wash exposed clothing and clean equipment appropriately.
If a skin reaction is severe, infected, or persistent, seek medical advice. MSD Veterinary Manual+1
8. When Should You Contact a Poultry Veterinarian?
Not every parasite infestation is an emergency, but some symptoms require prompt attention.
Seek veterinary help if your chickens experience:
- Very pale combs or wattles.
- Severe weakness or inability to stand.
- Significant weight loss.
- Open wounds or serious skin damage.
- Heavy parasite infestation.
- Reduced egg production accompanied by other illness signs.
- Continued infestation despite appropriate treatment.
Severe mite infestations can cause anemia and may become life-threatening.
Also remember that feather loss and scratching can have other causes, including nutritional deficiencies, feather pecking, and skin disease.
Correct identification helps prevent unnecessary treatment.
9. A Simple Weekly Chicken Parasite Inspection Checklist
You do not need complicated equipment to establish a useful inspection routine.
Once a week, take a few minutes to check your flock.
Chicken inspection
- Part feathers around the vent.
- Check under the wings.
- Inspect the breast and tail.
- Look for attached egg clusters.
- Check for skin irritation and feather damage.
- Observe scratching and preening behavior.
Coop inspection
- Examine roosting bars.
- Inspect nest box corners.
- Check wooden cracks and joints.
- Look beneath perches.
- Remove wet bedding.
- Check for tiny moving specks.
Flock health
- Observe appetite and drinking.
- Check comb and wattle color.
- Monitor egg production.
- Record unusual changes.
Consistent inspections make it easier to identify problems before they become widespread.
Final Thoughts
Chicken mites and lice may be tiny, but their impact on a backyard flock can be significant.
The most important step is learning to recognize the difference between parasites that live mainly on chickens and those that hide in the coop environment.
Inspect your birds carefully, check the housing regularly, choose treatments specifically approved for poultry, and follow the complete product instructions.
Remember that treating the chickens without addressing an infested environment may allow red poultry mites to return.
A clean coop, appropriate dust-bathing opportunities, careful quarantine, and routine inspections can make a meaningful difference.
Healthy chickens start with attentive keepers. Catch the problem early, treat it correctly, and make prevention part of your everyday flock-care routine. 🐓