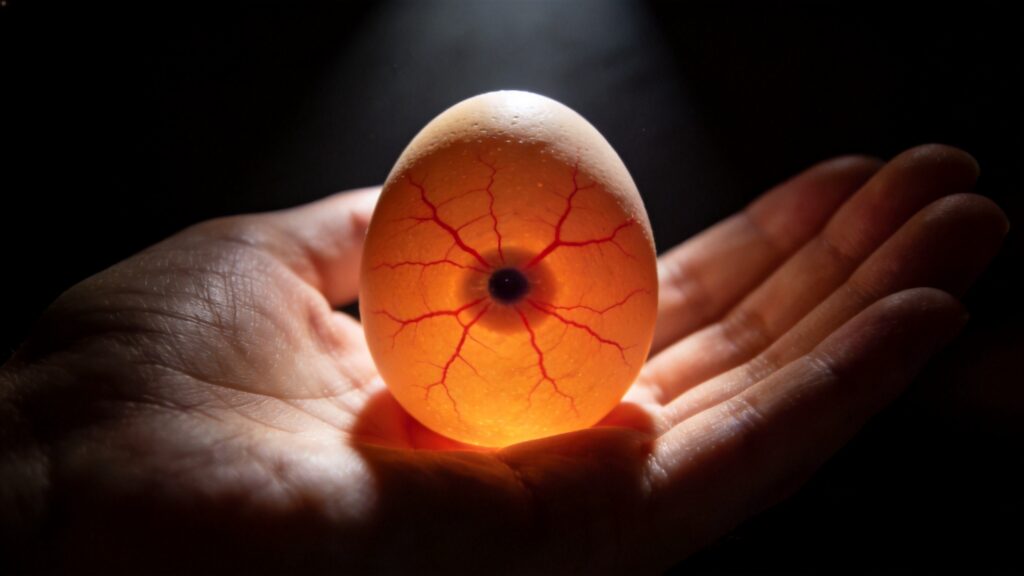
Whether you’re a first-time backyard chicken keeper or a seasoned small-farm incubator, egg candling is your window into the miracle of life. This day-by-day guide walks you through exactly what you should see—and what to ignore—from the first faint veins to the final dark mass before hatching. Grab your flashlight, dim the lights, and let’s see what’s growing inside.
Early Development: Days 3–4 – Spider Veins and the Embryo Dot
By day three or four, the most crucial signals of life appear. When you hold the egg to a bright light in a completely dark room, you should observe a network of thin, branching spider veins radiating from a central point. This is the first visible circulatory system, and it looks exactly like a tiny red spiderweb or a delicate fern leaf. At the center of those veins lies the embryo dot—a small, dark, slightly moving speck. Don’t expect a recognizable chick shape yet; this dot is about the size of a pinhead.
What if you see nothing but a clear, uniform glow? That’s a likely infertile or very early dead germ. But hold on—some eggs develop slowly, especially if they were stored before incubation. Give them until day 5 or 6 before concluding. One common mistake is over-zealous candling in bright daylight; always do it in a pitch-black room with a focused flashlight against the large end of the egg.
“The spider veins at day 3 are nature’s first signature of life. If you don’t see them, don’t panic—but do mark the egg and check again in 48 hours.” — Gail Damerow, The Chicken Encyclopedia
For practical success, use a high-lumen LED candler (a regular flashlight works, but an egg-specific candler reduces heat stress). Rotate the egg slowly, and never candle for more than 10 seconds at a time—cold air from the room can shock the embryo. I once had a batch where half the eggs looked empty at day 4, but by day 6 they were full of veins; the eggs had just been sitting in a cool pre-incubation storage. Patience is your best tool here.
- What to look for: Spider-like red veins branching from a central dark dot.
- What to avoid: Candling in bright light or for longer than 10 seconds.
- Common confusion: A yolk shadow can mimic an embryo—real embryos have branching veins attached.
Active Growth: Days 7–10 – Movement and Clear Veins
By day 7, the embryo has grown significantly. Now the veins become thicker, more defined, and spread across nearly half the egg. You’ll see the embryo as a dark, moving blob—often twitching or rotating. Yes, real movement! If you’re lucky, you might catch a tiny leg kick or a head bob. This is also the stage when you can sometimes see the embryo’s eye as a dark ring on the side of the head. The air cell at the blunt end will have expanded noticeably, looking like a clear bubble just inside the shell.
Between days 8 and 10, the development accelerates. The veins now cover most of the egg’s interior, and the embryo appears as a large, dark mass with a visible heartbeat if the light hits at the right angle. You might even see the chorioallantoic membrane (the blood-vessel-rich sac) pressing against the inner shell membrane. At this stage, a healthy egg shows a clear, bright air cell boundary, while the rest is dark with active veins.
I recommend creating a simple candling log with columns for date, egg number, and observations. I once missed a dead embryo because I only looked for movement and didn’t notice the veins had become cloudy and detached. A log forces you to look at the whole picture. Also, if you see a blood ring (a circular, solid blood vessel with no embryo)—that’s a sign of early death, usually from temperature fluctuations or genetic issues.
| Normal | Red Flag |
|---|---|
| Clear, branching veins covering 50–70% of egg | Cloudy, detached, or broken veins |
| Visible embryo movement (twitching, rotating) | Complete stillness with large dark area (dead embryo) |
| Sharp air cell boundary with translucent edge | Fuzzy or moving air cell (possible bacterial contamination) |
- Prepare: Gather a bright light source, a dark room, and a soft towel to prevent egg rolling.
- Position: Hold the egg with the large end (air cell) facing the light.
- Scan: Tilt the egg gently to observe different angles—the embryo often hides behind the yolk.
- Time: Limit candling to 30 seconds total per egg per session to avoid chilling.
- Record: Mark each egg as “live,” “dead,” “infertile,” or “questionable.” Re-check questionable ones in 2 days.
Final Stages: Days 14–18 – Dark Mass and Air Cell Growth
From day 14 onward, the embryo has become so large that the entire egg appears dark except for the rapidly expanding air cell. You can no longer see individual veins because the chick’s body blocks the light. The air cell now occupies a full quarter to a third of the egg’s volume, forming a distinct, crescent-shaped gap at the blunt end. As the chick prepares for internal pipping (around day 18–20), it will tilt its head toward the air cell, and you might see the beak shadow pressing against the membrane.
One of the most exciting sights during this period is the air cell boundary “wiggle” caused by the chick’s breathing movements. Yes, you can actually see the membrane pulse! Use a strong flashlight at an angle—if you see a tiny dark triangle at the edge of the air cell, that’s the beak getting ready. By day 18, you should also stop turning the eggs automatically (if using an incubator) to allow the chick to position itself for hatching. Do not candle during the last 3 days before hatch—the disturbance can cause the chick to break the membrane prematurely or become malpositioned.
A word about opacity vs. health: A completely dark egg with a clean air cell is usually a sign of a strong, active chick. But if you see a clear, empty space below the air cell (like a second bubble), that may indicate the chick is not absorbing the yolk properly—a potential death sentence. Similarly, any foul smell or cracked shell means immediate removal. I once had a batch where one egg looked perfect, but the chick never pipped—it had died because the humidity was too low, causing the inner membrane to stick. Always check your humidity gauge during the lockdown phase (days 18–21).
- Beak shadow
- A dark, pointed triangle visible in the air cell around day 17–18, indicating the chick’s head is positioned correctly.
- Air cell growth rate
- By day 14, the air cell should be about 1/4 of the egg; by day 18, about 1/3. Slow growth means low humidity, fast growth means high humidity.
- Internal pip
- When the chick breaks the inner membrane into the air cell—you’ll hear a faint peeping and see the air cell move suddenly.
How to Handle a “Dark Vacuum” (Day 16–18)
Many beginners panic when the egg becomes a solid dark mass with no visible detail. This is completely normal. At this stage, stop looking for veins and focus on the air cell. Use a bright candler directly on the large end. If the air cell is clean, clear, and has a sharp boundary, your egg is almost certainly viable. If the air cell is misshapen or contains dark spots (like pieces of debris), the chick may have died and started decomposing—discard that egg before it contaminates others.
- Days 14–15: Dark mass fills 80% of egg; air cell distinct and moving slowly.
- Days 16–17: Beak shadow may appear; listen for light peeping (sometimes audible through the shell).
- Day 18: Stop turning, increase humidity to 65–70%, and no more candling until after hatch.
Transitioning from the final candling to lockdown, remember that less is more. You’ve already gathered all the information you need: if an egg looked strong at day 14, it’s almost certainly going to hatch. Your job now is to maintain stable incubation conditions and resist the urge to peek. Open the incubator only to add water; every opening drops humidity and temperature, which can delay or kill the chicks.
Conclusion: Trust the Process, Not Just the Light
Candling is a powerful, non‑invasive way to monitor embryo development, but it’s only one tool. The true art lies in combining visual checks with consistent temperature, humidity, and egg turning. Use this day-by-day guide to identify life, spot trouble early, and learn from each batch. Remember: every embryo is unique—don’t panic if your day 3 looks like my day 3.5. Keep a journal, stay curious, and soon you’ll be reading eggs like a pro.