For the cleanliness-conscious backyard poultry keeper, the joy of fresh eggs can quickly sour when faced with the daily reality of manure management. Ducks and chickens, while both beloved, present fundamentally different waste challenges. Understanding these differences is the first step to transforming a messy chore into an efficient system that keeps your coop pristine, your nose happy, and your garden thriving. This guide offers actionable strategies tailored to each bird, ensuring your urban or suburban homestead remains a place of pride, not odor.
Duck vs. Chicken Waste: A Side-by-Side Comparison
Before you can design a cleaning routine, you must know what you are dealing with. Duck and chicken manure differ significantly in water content, volume, and odor profile. The table below summarizes the key metrics every clean-keeper should know.
| Metric | Chicken | Duck |
|---|---|---|
| Wet weight | 100–150 g (3.5–5.3 oz) | 150–200 g (5.3–7 oz) |
| Moisture content | 70–75% | 85–90% |
| Nitrogen (fresh) | 1.5–2.0% | 1.0–1.5% |
| Odor level (fresh) | Low to moderate | Low |
| Odor after 24 hours | Moderate (ammonia) | High (ammonia + sulfur) |
| Consistency | Crumbly, semi-solid | Semi-liquid, sloppy |
The most striking difference is water content. Chicken manure is relatively dry, which makes it easier to manage with deep litter methods. Duck manure, by contrast, is almost a slurry. “Ducks don’t so much poop as they hose down their bedding,” quips Poultry Keeper magazine contributor Liz DeWitt. This high moisture creates two problems: it accelerates ammonia release and it saturates standard bedding within hours. However, fresh duck manure actually has less odor than chicken manure—the real trouble begins when it breaks down in a wet environment. For the clean-conscious keeper, the challenge with ducks is not the waste itself, but the water management around it. Chickens, on the other hand, produce more concentrated nitrogen and can quickly generate ammonia in confined spaces if ventilation is poor.
“The secret to a clean coop isn’t fighting waste—it’s outsmarting water. With ducks, every drop of moisture you remove from the bedding is a drop of ammonia you prevent.” — Jenna Woginrich, author of Barnyard in Your Backyard
Designing a Clean Coop: Bedding, Drainage, and Daily Routines
Armed with the knowledge of waste profiles, you can tailor your coop environment. The goal is to separate the birds from their waste as quickly as possible while keeping the space comfortable. Below are three pillars of a hygienic system.
Bedding Choices: Absorbency + Compostability
For chickens, pine shavings remain the gold standard. They are absorbent, low-dust, and compost well. Avoid cedar, as its oils can irritate respiratory systems. A deep litter method (allowing bedding to build up for weeks to months) works beautifully—provided you stir it every few days to incorporate droppings and promote aerobic decomposition. Example: Sarah in Vermont uses 4 inches of pine shavings in her chicken coop and adds a fresh layer once a week. She only does a full cleanout every 3 months, with zero odor problems.
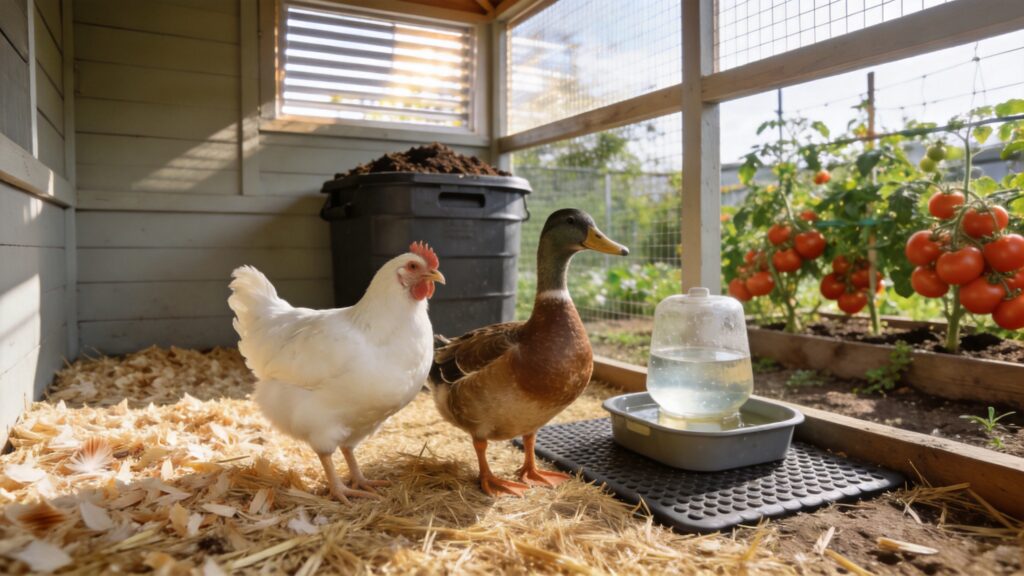
For ducks, deep litter is a disaster. Their wet manure creates anaerobic pockets that stink within days. Instead, use highly absorbent, fast-draining materials. Straw pellets (biodegradable horse bedding) or hemp bedding are excellent choices—they absorb 4–5 times their weight in moisture. Another option: sand (coarse, not play sand). Sand drains instantly and can be scooped like cat litter. It’s heavy to move but lasts indefinitely. Pro tip: Place a large rubber mat under the duck’s water station; remove and hose it off daily.
Drainage and Ventilation: The Unsung Heroes
For ducks, drainage is non-negotiable. If your duck run is on soil, create a sloped concrete or gravel pad that directs liquids away. Indoors, use a wire-floored sleeping area (with a deep tray underneath) to let droppings fall through. This keeps birds clean and bedding dry. For chickens, focus on ventilation. An ammonia sensor isn’t necessary—if your eyes water when you enter the coop, you need more airflow. Install a ridge vent or solar-powered fan. Even in winter, a small opening at the top allows moisture to escape without creating a draft at bird level.
Cleaning Routines: Daily, Weekly, Monthly
Consistency is the key to a pristine coop. Use these schedules as a starting point, adjusting for flock size.
- Daily (5 minutes): Spot-clean wet patches. For ducks, remove any visibly saturated bedding near waterers. For chickens, turn over top layer in high-traffic areas. Refill water and food.
- Weekly (20 minutes): Strip out all bedding from duck sleeping areas; replace with fresh. For chicken deep litter, add a fresh 1–2 inch layer on top. Scrub waterers with vinegar solution. Check for mites.
- Monthly (1 hour): Full cleanout of chicken coop (if using shallow litter method). For ducks, remove all bedding from entire run if muddy. Hose down everything with a 1:10 vinegar-water mix. Let dry completely before reinstalling.
Example from the field: Tom in Oregon keeps 8 ducks and 10 chickens. He uses a “two-zone” system—ducks get a gravel-bottomed pen with a daily hose-down; chickens get deep pine shavings in a well-ventilated shed. He spends less than 10 minutes a day total, and visitors are always surprised that the property smells like fresh hay, not ammonia.
From Mess to Garden Gold: Composting Poultry Waste
The final step for the cleanliness-minded is turning waste into a resource. Both duck and chicken manure are excellent nitrogen sources for the garden, but they must be composted properly before use. Raw manure can burn plants, carry pathogens, and smell appalling if left in a pile. Here’s how to do it right.
Hot Composting vs. Cold Composting
The hot composting method is ideal for poultry waste because it reaches temperatures of 131–160°F (55–71°C), killing weed seeds, fly eggs, and most pathogens. Aim for a carbon-to-nitrogen ratio of 25:1 to 30:1. Chicken manure is “hot” (high N); duck manure, while slightly lower in N, still needs a lot of browns. Good carbon sources include dry leaves, straw, wood shavings (from your coop!), and shredded paper. Build a pile at least 3x3x3 feet, water it to the consistency of a wrung-out sponge, and turn it every 2–3 days. Within 4–6 weeks you’ll have dark, crumbly compost with a pleasant earthy smell.
If you prefer slow composting, simply stack the manure in a bin with plenty of browns and let it sit for 6–12 months. This is less labor but takes space and patience. Caution: Never apply fresh poultry manure to vegetable gardens, especially root crops or leafy greens you eat raw. Wait until the compost is fully cured.
Practical Systems for the Homeowner
- Tumbling composter – great for small flocks (up to 6 birds). Add manure and shredded newspaper in equal parts; tumble daily. Best for chicken manure (drier).
- Three-bin system – ideal for larger flocks or mixed duck/chicken waste. Bin 1: fresh additions. Bin 2: actively decomposing (turn weekly). Bin 3: finished compost. Place near the coop for easy disposal.
- Vermicomposting (worm bins) – Can ducks and chicken manure be wormed? Yes, but only in moderation. Worms cannot handle high ammonia. Mix 1 part fresh manure (well-aged for 2 weeks) with 3 parts bedding and food scraps. Red wigglers will thrive.
Real-world example: The Millers in Texas have 12 hens and 4 ducks. They use a two-bin system: one for chicken manure (which dries quickly and composts fast) and a separate bin for duck manure mixed with extra straw. They add a Bokashi bran starter to the duck bin to speed fermentation and reduce odor. Within 8 weeks, they spread the compost on their raised beds, and their tomatoes are the envy of the neighborhood.
Safety Note: What Not to Compost
Never compost sick bird carcasses or large amounts of spoiled feed. Avoid adding cat or dog feces. If you use cedar shavings or treated wood pellets, keep them out of the compost—they can inhibit microbial activity and introduce harmful chemicals.
Conclusion
Managing duck and chicken waste doesn’t have to be a dirty job. By understanding the distinct moisture and odor profiles of each species, choosing the right bedding system, and committing to a simple daily routine, you can keep your coop fresh and your conscience clear. Then, by composting the manure, you close the loop—turning a potential hygiene headache into nutrient-rich fertilizer for your garden. Your birds, your nose, and your tomato plants will thank you.