Introduction: Why That Strong Ammonia Smell Shouldn’t Be Ignored
🐔 You open your chicken coop after a long winter and immediately notice a sharp, unpleasant odor that seems stronger than ordinary chicken manure. If your chicken coop smells like ammonia, the problem may involve accumulated droppings, damp bedding, and insufficient ventilation rather than simply a coop that needs fresh bedding. Although some manure odor is normal, a noticeable ammonia smell deserves immediate attention because prolonged exposure can irritate your chickens’ eyes and respiratory systems.
❄️ Winter makes this problem particularly frustrating because owners often close windows and vents to protect their birds from freezing temperatures. Unfortunately, reduced airflow allows humidity and gases to accumulate, especially when moisture from droppings, waterers, and condensation becomes trapped inside the bedding. The safest first response is to check your chickens, locate wet manure and bedding, and improve airflow before purchasing deodorizing powders or other odor-control products.
Why Does My Chicken Coop Suddenly Smell Like Ammonia?
💨 Ammonia develops when microorganisms break down nitrogen-containing compounds in chicken manure, particularly when the litter becomes moist. A coop may smell reasonably clean during early winter but gradually develop stronger odors as droppings accumulate beneath roosting bars and damp bedding becomes compacted. Moisture, manure accumulation, litter conditions, and limited air exchange can combine to create the unpleasant ammonia smell in a chicken coop.
🌨️ Cold weather encourages owners to seal openings, but chickens continue releasing moisture through breathing and droppings throughout the season. When humid indoor air reaches colder surfaces, condensation can develop on windows, roofing, and walls, eventually contributing to wet litter below. As temperatures rise after winter, previously accumulated moisture and manure may become more noticeable, making the odor seem to appear suddenly.
What Should I Check First When I Smell Ammonia?
Inspect The Bedding Beneath Roosts
🔍 Start beneath the roosting bars because chickens deposit substantial amounts of manure while sleeping. Lift the upper bedding layer and examine whether the material underneath is damp, compacted, darkened, or heavily contaminated with droppings. A dry-looking surface does not guarantee that deeper litter remains suitable for the flock.
Look For Water Leaks And Damp Corners
💧 Inspect drinking equipment, waterer bases, roof joints, walls, and corners where moisture may collect unnoticed. A leaking poultry drinker can continuously wet the same bedding, creating conditions favorable for ammonia production even when the rest of the coop appears clean. Check whether nearby wood, flooring, or bedding remains damp after removing the obvious wet material.
Check Ventilation And Condensation
🌬️ Examine ventilation openings for winter coverings, accumulated dust, blocked mesh, or objects restricting airflow. Condensation on windows, wet roofing, and persistent humidity suggest that the building may not be exchanging enough indoor air with the outdoors. Proper ventilation should remove moisture and stale air without directing strong, cold drafts onto roosting chickens.
Observe Your Chickens’ Health
🐓 Watch the flock before beginning extensive cleaning, especially if the ammonia odor is unusually strong. Red or watery eyes, repeated eye closure, unusual breathing sounds, coughing-like movements, or open-mouth breathing may indicate irritation or another health problem requiring investigation. Birds showing significant breathing difficulty, weakness, or severe eye problems need prompt veterinary attention.
How To Reduce Ammonia In Your Chicken Coop
Step 1: Protect The Birds And Remove Contaminated Bedding
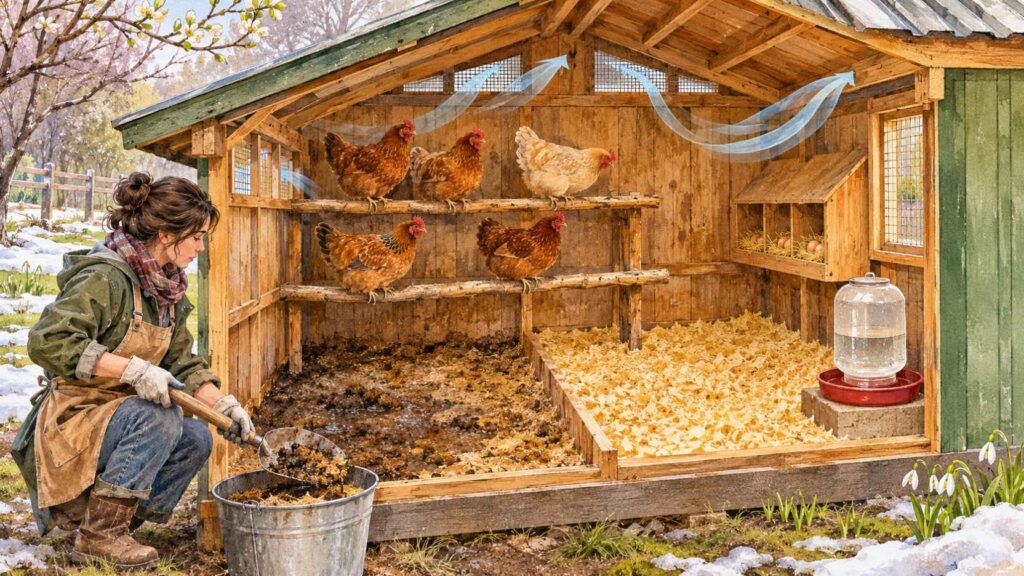
🚨 If the odor is overwhelming, causes eye or throat irritation, or coincides with visibly distressed chickens, move the flock to clean, well-ventilated, predator-secure temporary housing. Remove wet, manure-heavy, and compacted litter using appropriate gloves and respiratory protection, and avoid aggressively stirring contaminated material while birds remain nearby. Dispose of the material appropriately, and keep chickens away from the cleaning area until conditions improve.
Step 2: Correct The Moisture Source
🛠️ Cleaning accomplishes little if leaking waterers, roof damage, or condensation continue soaking the replacement bedding. Repair the source of moisture and inspect the underlying floor before introducing fresh litter, particularly where wooden surfaces have absorbed water. Allow damp surfaces to dry sufficiently because covering them immediately may trap moisture underneath another bedding layer.
Step 3: Restore Airflow And Add Clean Bedding
🌬️ Reopen appropriate ventilation pathways, making sure fresh air can enter and moisture-laden air can escape without exposing roosting birds to direct cold drafts. Once the area is cleaned and reasonably dry, replace contaminated bedding with clean, absorbent material such as suitable untreated pine shavings. Continue monitoring the coop because persistent odor after cleaning may indicate hidden dampness, excessive manure accumulation, or inadequate ventilation.
When Is Ammonia Dangerous For Backyard Chickens?
⚠️ Ammonia irritates sensitive tissues, and sustained exposure can damage the eyes and respiratory tract of poultry. Research on poultry housing associates elevated ammonia exposure with eye irritation, impaired respiratory defenses, and increased susceptibility to health problems. Chickens cannot explain their discomfort, making changes in breathing, eye appearance, and general activity important warning signs.
👃 Smell alone cannot establish an accurate ammonia concentration because odor sensitivity varies and people can become accustomed to persistent smells. A poultry-appropriate ammonia monitoring device may provide additional information, but home management should not depend on waiting for a particular reading before correcting obvious contamination. If birds develop persistent respiratory symptoms or significant eye irritation, contact a veterinarian familiar with poultry and investigate other possible causes of illness.
Why Adding More Bedding Isn’t Always The Answer
🪵 Some owners respond to bad odors by spreading fresh straw or shavings over the existing litter, expecting the new material to absorb the problem. This can temporarily improve the surface, but it does not reliably correct a saturated, compacted layer underneath. Adding clean bedding over heavily contaminated material is not a substitute for removing the source of ammonia.
🌱 Properly managed deep-litter systems require sufficient dry material, ventilation, moisture monitoring, and active maintenance rather than uncontrolled manure accumulation. If the existing bedding feels wet, becomes excessively compacted, or releases strong ammonia odors, the system requires corrective action regardless of the cleaning method originally planned. Avoid relying on perfume, deodorizing sprays, household bleach, or unverified chemical treatments to disguise odors, and never mix bleach with ammonia-containing substances.
How To Keep Ammonia From Returning
Establish A Daily Moisture Inspection
✅ Spend a few minutes checking drinking areas, the bedding beneath roosts, and corners that remain shaded or poorly ventilated. Remove fresh wet spots and concentrated manure before they spread into surrounding litter, especially after water spills or rainy weather. This simple habit makes chicken coop ammonia prevention easier than repeatedly performing emergency cleanouts.
Review Bedding And Ventilation Every Week
📅 Lift sections of bedding weekly to check for hidden dampness, compacted patches, or a developing odor. Examine vents for obstructions and inspect whether condensation persists during cold mornings or after warmer daytime temperatures. Increase cleaning frequency when moisture accumulates rather than following a calendar that ignores actual coop conditions.
Adjust For Flock Size And Seasonal Changes
🐔 More birds produce more manure and moisture, so an overcrowded coop can overwhelm an otherwise reasonable bedding and ventilation routine. Provide adequate indoor space, suitable roosting arrangements, and enough clean drinking stations without allowing waterers to leak into the sleeping area. During winter and seasonal transitions, reassess ventilation and litter conditions instead of assuming the same setup will work throughout the year.
Chicken Coop Ammonia Troubleshooting Checklist
📋 Use this checklist whenever you notice an ammonia smell in your chicken coop, particularly after winter or prolonged wet weather. Start with visible contamination and animal health, then work through bedding, water equipment, ventilation, and maintenance conditions. The goal is to identify what to observe, what to do, and when to worry before a manageable problem becomes a serious flock-health concern.
| What To Observe | What To Do | When To Worry |
|---|---|---|
| ☐ Strong ammonia odor | Improve ventilation and inspect manure immediately | Odor is overwhelming or birds appear distressed |
| ☐ Wet bedding beneath roosts | Remove contaminated material and replace with dry bedding | Moisture repeatedly returns |
| ☐ Leaking waterer | Repair or replace equipment and dry surrounding litter | Drinking areas remain constantly soaked |
| ☐ Condensation on windows | Improve controlled airflow and check insulation or moisture sources | Persistent dripping wets bedding |
| ☐ Blocked ventilation | Clear vents and restore appropriate air exchange | Stale air persists after correction |
| ☐ Red or irritated eyes | Improve air quality and closely observe affected birds | Irritation persists or becomes severe |
| ☐ Unusual breathing | Move affected birds to cleaner air and seek veterinary guidance | Open-mouth breathing, weakness, or marked respiratory distress |
| ☐ Wet, compacted deep litter | Remove saturated material and reassess the litter system | Strong odor persists beneath fresh bedding |
| ☐ Odor returning after cleaning | Check hidden leaks, manure accumulation, and airflow | Repeated episodes despite corrective action |
Conclusion: Fix The Moisture And Airflow Before The Smell
🏡 When your chicken coop smells bad in winter, the first solution is not necessarily a deodorizing product or a complete redesign of the building. Start by protecting your birds, removing contaminated bedding, identifying moisture sources, and restoring appropriate ventilation. These steps address the conditions responsible for ammonia buildup rather than simply covering the unpleasant smell.
🐔 A properly maintained coop does not need to smell like perfume, but it should not expose chickens to persistent, sharp ammonia odors. Daily inspections, timely manure removal, dry bedding, functional waterers, and reliable airflow make an enormous difference throughout winter and spring. The best way to get rid of ammonia in a chicken coop is to prevent wet manure from accumulating and ensure stale, humid air can escape.