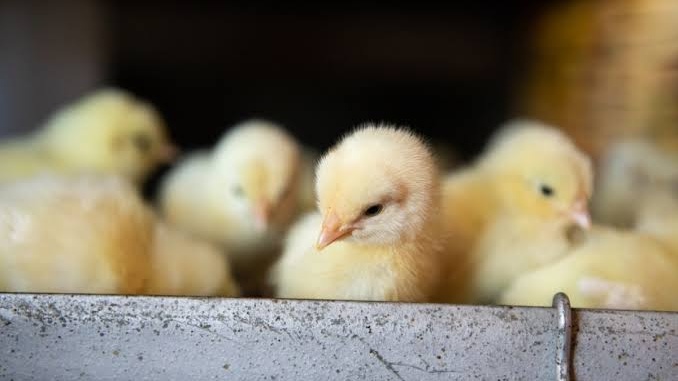
The moment you hear that your mail-order chicks have arrived, the excitement can quickly turn into a question: What should I do first?
Baby chicks have just completed a stressful journey. They have been transported in a box, exposed to unfamiliar sounds and temperatures, and are now entering a completely new environment.
The first 24 hours are therefore less about doing complicated things and more about providing the basics correctly: warmth, water, appropriate food, safety, and observation.
If your chicks have arrived by mail, use this timeline as a practical first-day checklist.
Before the Chicks Arrive: Have the Brooder Ready
The first 24 hours actually begin before delivery.
Your brooder should already be assembled, cleaned, and operating before the chicks arrive.
Prepare:
- A secure brooder enclosure
- An appropriate heat source
- Clean, dry bedding
- Chick starter feed
- Fresh drinking water
- A chick-sized feeder
- A chick-sized waterer
- Good ventilation
- Protection from drafts
- A thermometer for monitoring conditions
Do not wait until the shipping box arrives to start setting everything up.
A baby chick should not spend an additional hour sitting in a shipping container while you search for bedding or assemble a feeder.
0–1 Hour: Open, Count, and Observe
When the chicks arrive, open the shipment promptly.
Do not leave the box sitting unopened for hours.
First, count the chicks.
Compare the number with your order confirmation or shipping documentation.
Then look at the birds individually and as a group.
You are checking for obvious problems such as:
- Severe weakness
- Difficulty standing
- Obvious injury
- Abnormal breathing
- Extreme lethargy
- A chick that cannot move normally
Not every tired chick is necessarily sick.
Travel can be stressful, and chicks may be quiet or sleepy immediately after arrival.
The goal during this first inspection is to identify obvious concerns and move the chicks into their prepared environment.
If you notice a serious problem, document it with photographs before making unnecessary changes.
Move the Chicks Into the Prepared Brooder
Once the initial inspection is complete, transfer the chicks to the brooder.
The brooder should provide a warm area as well as enough space for chicks to move away from the heat.
Do not simply place the chicks in a small container with no temperature gradient.
Chicks need the ability to move toward or away from the heat source according to their comfort.
Their behavior is an important indicator.
If they are constantly piling directly under the heat source, they may be too cold.
If they are consistently staying far away from the heat and appear uncomfortable, the environment may be too warm.
A comfortable group should generally spread out, move around, eat, drink, and rest.
1–6 Hours: Focus on Water and Feed
Once the chicks are settled, make sure they have access to clean water.
Young chicks need easy access to drinking water, particularly after transportation.
A shallow chick waterer can help reduce the risk of chicks falling into deep water.
You can gently guide a chick toward the water so it recognizes where the waterer is located.
Avoid repeatedly handling the birds or forcing them to drink large amounts.
The goal is simply to make clean water easily accessible.
Next, provide an appropriate chick starter feed.
Do not substitute adult layer feed for chick starter.
Young birds have different nutritional requirements from mature laying hens.
Place the feeder where the chicks can easily find it.
Keep food and water accessible without creating unnecessary crowding.
Watch the Group, Not Just One Chick
During the first several hours, observe the entire group.
Healthy, comfortable chicks will generally alternate between periods of activity and rest.
You may see them:
- Walk around
- Eat
- Drink
- Sleep
- Explore
- Gather together briefly
- Move between warmer and cooler areas
That pattern is more useful than expecting every chick to behave identically.
One chick may sleep while several others are eating. A few minutes later, their positions may reverse.
Pay more attention to persistent abnormal behavior than to brief periods of inactivity.
6–12 Hours: Check for Weak or Struggling Chicks
After several hours, inspect the group again.
This is a good time to identify chicks that are not keeping up with the others.
Watch for a chick that:
- Remains unusually inactive
- Has difficulty standing
- Cannot reach food or water
- Is repeatedly pushed away by stronger chicks
- Has abnormal breathing
- Appears injured
- Is unable to maintain normal body position
A weak chick may need closer observation and easier access to warmth, food, and water.
If a chick is being repeatedly pushed away from the feeder or waterer, make sure the setup provides enough access points.
Do not automatically assume that a weak chick is simply tired from transportation.
If the condition is severe or worsening, contact the hatchery and, when appropriate, a poultry veterinarian.
What If One Chick Arrives Weak?
The phrase “chicks arrived weak” is common among new chicken keepers because transportation can be stressful.
First, assess the chick calmly.
Is it breathing normally?
Can it stand?
Can it move?
Can it reach warmth?
Can it drink?
Can it access food?
If the chick is seriously weak, injured, or showing abnormal breathing, contact the hatchery promptly.
Take clear photographs and record the time you received the shipment.
Also keep your order number, shipping information, and chick count.
The hatchery may have specific instructions for documenting problems and may need to know when the shipment arrived.
12–24 Hours: Establish a Stable Routine
By the second half of the first day, the goal is stability.
You want the chicks to have:
- Consistent access to warmth
- Clean water
- Appropriate feed
- Dry bedding
- Adequate ventilation
- Enough space
- A secure brooder
Check the water regularly.
Baby chicks can scratch bedding into waterers surprisingly quickly.
Replace contaminated water rather than assuming it is still clean enough.
Also check bedding for excessive moisture.
Wet bedding can create an unhealthy brooder environment and may stick to chicks’ feet or feathers.
Things You Should NOT Do
New chicken keepers sometimes make the situation more complicated by trying too many things.
Don’t give adult chicken feed
Use an appropriate chick starter formulated for young poultry.
Don’t give the chicks a bath
A normal newly arrived chick does not need a bath.
Getting a young chick wet can create unnecessary chilling risk.
Don’t over-handle them
Observation is more important than constant handling during the first day.
Don’t put them directly outside
Mail-order chicks need a controlled brooder environment rather than immediate exposure to outdoor conditions.
Don’t mix them immediately with adult chickens
Adult birds can injure young chicks and may expose them to disease.
Don’t ignore persistent problems
If a chick continues to struggle, becomes increasingly lethargic, has difficulty breathing, or cannot eat or drink, seek appropriate professional guidance.
Why Temperature Alone Isn’t Enough
Many beginners focus on one thermometer reading.
Temperature is important, but behavior also provides useful information.
If all the chicks are packed tightly together and continuously vocalizing, they may be uncomfortable.
If they are consistently avoiding the heat source, the brooder may be too warm.
If they move comfortably between warmer and cooler areas, eat, drink, sleep, and explore, the setup may be more suitable.
The exact environmental requirements can change as chicks grow, so continue adjusting the brooder rather than treating the first-day setup as permanent.
Mail-Order Chick Arrival Checklist
Keep this checklist near the brooder:
Immediately after arrival
- Open the shipment promptly
- Count the chicks
- Check for obvious injuries
- Observe breathing
- Check activity level
- Photograph serious problems
First few hours
- Move chicks into the prepared brooder
- Provide clean water
- Provide chick starter
- Monitor their behavior
- Check the heat area
- Check bedding
6–12 hours
- Recheck all chicks
- Identify weak chicks
- Make sure every chick can access water
- Make sure every chick can access feed
- Replace contaminated water
- Remove wet bedding
12–24 hours
- Continue monitoring
- Confirm normal eating and drinking
- Check brooder security
- Maintain clean bedding
- Keep hatchery information available
- Contact the hatchery about serious problems
When Should You Contact the Hatchery?
Contact the hatchery promptly if there is a serious issue with the shipment, particularly if chicks arrive dead, seriously injured, or unusually weak.
Do not wait several days if you have a problem that needs to be reported.
Before contacting the hatchery, gather:
- Order number
- Shipping date
- Arrival time
- Number of chicks ordered
- Number received
- Description of the problem
- Clear photographs
- Any relevant shipping information
Follow the specific hatchery’s instructions because policies vary.
The Goal of the First 24 Hours
The first day with mail-order chicks does not need to be complicated.
Your job is to create a stable environment and observe the birds.
Warmth. Water. Feed. Safety. Observation.
Those five priorities should guide your first day.
Don’t panic if the chicks sleep frequently or behave differently from one another. At the same time, don’t ignore persistent signs of weakness or illness.
By preparing the brooder before delivery, checking the chicks immediately, providing clean water and appropriate starter feed, and monitoring their behavior throughout the first 24 hours, you can give your new flock a much smoother transition from the hatchery to your backyard.