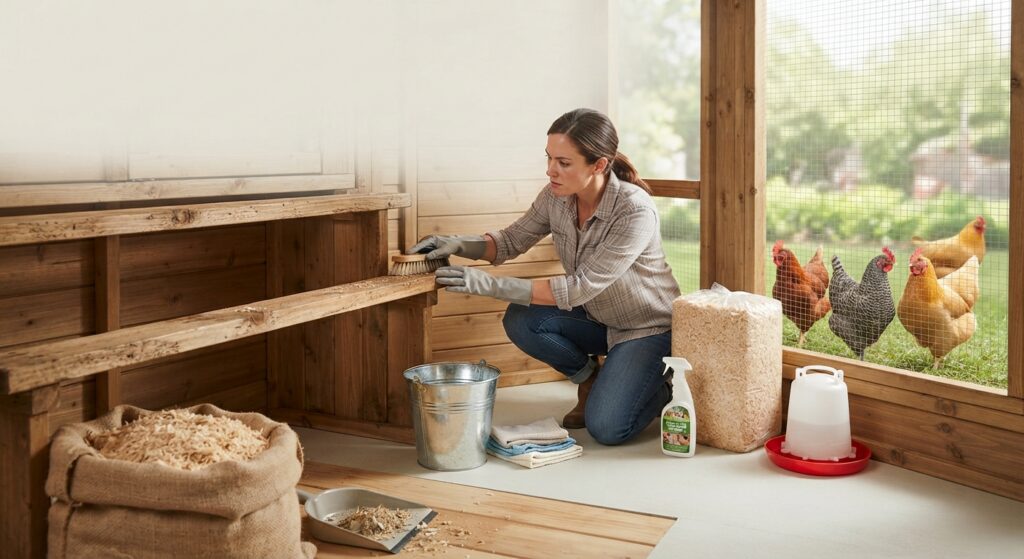
Introduction
Finding mites or lice on your chickens is only the beginning.
Once the birds have been inspected and an appropriate parasite-control plan is underway, you also need to look at their environment.
A dirty or poorly maintained coop can make parasite problems harder to manage. And if you clean only the obvious surfaces while ignoring cracks, roost joints, nest boxes, and other hiding places, you may miss important areas.
But there is an important distinction:
Cleaning the coop is not the same thing as treating a parasite infestation.
Chicken lice generally spend most of their life on the bird, while some poultry mites can spend significant periods hiding in the environment. That means the environmental approach can differ depending on what parasite you’re dealing with.
Here’s a practical way to clean and reset your chicken coop after a suspected or confirmed mite or lice problem. 🧼🐔
🕷️ First: Know What You’re Cleaning For
Before grabbing the hose and a bucket, identify the type of parasite if possible.
Lice
Chicken lice generally live on the chicken.
They can cause:
- Scratching
- Excessive preening
- Feather damage
- Irritated skin
- Visible insects
- Eggs attached to feather shafts
Because lice spend most of their life on the bird, treating and inspecting the flock is particularly important.
Cleaning the coop is still sensible, but repeatedly disinfecting every crack in the building is not necessarily the main solution for a lice problem.
Mites
Mites vary in behavior.
Some remain primarily on birds, while others, such as poultry red mites, can spend substantial amounts of time hiding in the coop and emerge to feed.
For these environmental mites, cleaning and inspecting the housing becomes especially important.
The parasite you are dealing with should determine how much attention you give the coop itself.
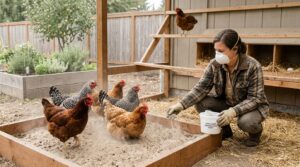
🧤 Before You Start: Protect Yourself
Cleaning a chicken coop can involve dust, dried droppings, feathers, and other organic material.
Before starting:
- Wear gloves
- Wear washable work clothing
- Use suitable footwear
- Avoid stirring up unnecessary dust
- Wash your hands afterward
- Keep cleaning materials away from household food-preparation areas
If the coop is extremely dusty, respiratory protection may be appropriate.
The goal is not just to make the coop look cleaner.
You want to remove accumulated organic material while avoiding unnecessary exposure to dust and contaminants.
🐔 Move the Chickens Out First
Never try to perform a thorough coop clean while chickens are standing inside.
Move the flock to a safe temporary area with access to:
- Clean water
- Appropriate feed
- Shade or shelter
- Protection from predators
- Comfortable conditions
This also gives you a chance to inspect the birds separately.
Remember:
A clean coop cannot solve a parasite problem if affected chickens are simply returned without appropriate parasite control.
🧹 Step 1: Remove Everything You Can
Start with the easiest principle:
Take out removable materials before trying to clean the structure.
Remove:
- Old bedding
- Nesting material
- Loose feathers
- Accumulated manure
- Disposable liners
- Debris
- Empty feed containers
- Removable perches
Bag or dispose of contaminated waste appropriately.
Don’t simply move dirty bedding from one side of the coop to another.
You are trying to remove the material that has accumulated over time.
🪵 Step 2: Remove the Roosts If Possible
Roosts deserve special attention.
They can have:
- Droppings
- Dust
- Feather debris
- Cracks
- Joints
- Hidden spaces
If the roost is removable, take it outside for easier inspection and cleaning.
Look carefully at:
Ends → underside → joints → brackets → screw holes
If you suspect poultry red mites, these areas are particularly worth examining because mites can hide in protected spaces during the day.
🔦 Step 3: Inspect Before Washing
Don’t immediately cover everything with water.
First, inspect the empty coop.
Use a flashlight to examine:
- Wall cracks
- Roost supports
- Corners
- Nest boxes
- Structural joints
- Gaps around fixtures
- Areas around doors
- Spaces behind removable components
If you are investigating a mite infestation, this is your opportunity to see whether suspicious organisms are still present.
Take photographs if you find something unusual.
Cleaning first can remove useful evidence before you have had a chance to identify the problem.
🧹 Step 4: Remove Dry Debris Carefully
Once you’ve inspected the structure, remove loose material.
Avoid aggressively sweeping or blowing contaminated dust around the coop.
Dry chicken manure and litter can produce significant dust when disturbed.
Instead:
- Work slowly
- Use appropriate protective equipment
- Keep unnecessary people and animals away
- Avoid creating clouds of dust
If the coop is heavily contaminated, take extra care with respiratory exposure.
💦 Step 5: Wash the Surfaces
After loose material has been removed, clean washable surfaces.
Depending on the construction of the coop, this may include:
- Floors
- Walls
- Roosts
- Nest boxes
- Doors
- Feeders
- Waterers
Use a suitable detergent or cleaning product according to its directions.
The purpose of cleaning is to remove organic material and grime.
Cleaning and disinfection are not exactly the same thing.
A surface covered with manure and dirt is difficult to disinfect effectively.
That’s why physical cleaning comes first.
🧽 Step 6: Scrub the Places You Usually Ignore
This is where a basic cleaning job can become much more useful.
Don’t focus only on the middle of the floor.
Scrub:
Roost joints
Parasites may hide around connections between pieces of wood.
Corners
Accumulated debris can remain hidden here.
Nest-box seams
Inspect the edges and joints carefully.
Wall-floor connections
These areas can collect dirt and debris.
Cracks in wooden structures
A crack may look insignificant but provide a protected hiding space.
Around hardware
Inspect screw heads, brackets, hinges, and other fixtures.
A clean-looking coop can still have plenty of neglected micro-spaces.
🪺 Step 7: Clean the Nest Boxes
Remove all old nesting material.
Inspect the box itself before replacing it.
Look at:
- Corners
- Cracks
- Undersides
- Joints
- Removable panels
If mites are suspected, don’t assume that replacing the straw or shavings alone solves the problem.
The structure itself needs inspection.
Once clean and dry, add fresh nesting material appropriate for your setup.
🚰 Step 8: Clean Feeders and Waterers
Don’t forget the equipment.
Wash feeders and waterers thoroughly.
Pay attention to:
- Corners
- Threads
- Seams
- Lids
- Bases
- Areas where feed or water accumulates
Rinse appropriately and allow items to dry before returning them to the coop.
Clean drinking equipment is important for general flock health regardless of whether parasites are present.
☀️ Step 9: Let the Coop Dry Completely
Drying is an important part of resetting the coop.
Good drying helps reduce persistent moisture and gives you an opportunity to inspect the structure again.
Allow washable surfaces to dry thoroughly before replacing bedding and returning the chickens.
If the coop stays damp, investigate why.
Look for:
- Roof leaks
- Poor drainage
- Waterer spills
- Condensation
- Poor ventilation
- Overcrowding
A permanently damp coop creates a different set of management problems.
🧱 Step 10: Look for Structural Hiding Places
If you are dealing with mites that spend time in the environment, cleaning is also an opportunity to identify structural weaknesses.
Look for:
- Cracked wood
- Loose boards
- Hollow spaces
- Gaps between components
- Loose roost fittings
- Unsealed joints
You don’t necessarily need to rebuild the entire coop.
But repairing or reducing unnecessary hiding spaces can make future inspections easier.
🕷️ Mites and Lice Require Different Thinking
This distinction is worth repeating.
If you’re dealing with lice:
The chicken is the primary place to focus.
Inspect and appropriately manage the birds, because lice generally remain on the host.
If you’re dealing with environmental mites:
The coop may become much more important.
Inspect roosts, cracks, nest boxes, and other areas where mites can hide.
This is particularly relevant for poultry red mites.
Cleaning strategy should follow parasite biology.
🧪 Should You Disinfect the Coop?
Disinfection can be useful in poultry management, but it is not automatically necessary for every routine cleaning situation.
If you choose to disinfect:
- Clean the surface first.
- Remove organic material.
- Use a product appropriate for the intended poultry environment.
- Follow the label’s dilution and contact-time instructions.
- Ensure surfaces are appropriately rinsed if required by the product.
- Allow the area to dry before chickens return.
Never assume that a stronger concentration is better.
More disinfectant does not automatically mean better results and may create unnecessary chemical exposure.
⚠️ Don’t Mix Cleaning Chemicals
This deserves its own warning.
Never casually mix cleaning or disinfecting products.
Some combinations can produce dangerous fumes or chemical reactions.
Use one product according to its instructions rather than experimenting with homemade chemical combinations.
Keep all cleaning products away from chickens, feed, drinking water, children, and other animals during use.
🌿 What About Diatomaceous Earth?
Some backyard chicken keepers use diatomaceous earth as part of their pest-management routine.
However, it should not be treated as a substitute for cleaning or an automatic cure for mites.
If you use a DE product, make sure it is appropriate for the intended use and follow the label.
Avoid creating airborne dust around chickens.
Remember:
Clean coop ≠ mite-free coop.
And:
DE ≠ guaranteed parasite control.
If you have a confirmed infestation, use an appropriate control strategy for the specific parasite.
🐔 Don’t Return the Chickens Too Quickly
Before returning the flock, check:
Is the coop dry?
Is fresh bedding in place?
Are feeders and waterers clean?
Have the chickens themselves been appropriately inspected and managed?
Have suspected hiding areas been addressed?
If the answer is yes, return the birds calmly.
Avoid overcrowding them into a temporary or permanent space that is too small.
🔄 The Cleaning Is Only One Part of the Cycle
A common mistake is thinking:
“I cleaned the coop, so the infestation is over.”
Not necessarily.
Consider the entire cycle:
Parasite → chicken → reproduction → flock exposure → environment → chicken
Depending on the parasite, different links in that cycle matter more.
For lice, the bird is particularly important.
For certain mites, the environment can play a major role.
This is why parasite identification matters before deciding how aggressively to clean or treat.
🐣 What About New Chickens?
A clean coop won’t protect an established flock from every new parasite introduction.
When bringing new chickens home, quarantine them according to appropriate poultry biosecurity practices.
Inspect the new birds for:
- Lice
- Mites
- Feather damage
- Skin abnormalities
- Weight and body condition
- Signs of illness
Don’t assume a healthy-looking chicken is parasite-free.
New birds can introduce problems that aren’t immediately obvious.
🔎 Schedule a Follow-Up Inspection
After cleaning and addressing the flock, don’t forget to check again.
Look at:
- The chickens
- The roosts
- Nest boxes
- Structural cracks
- Feather condition
- Scratching behavior
If you suspected mites, a nighttime inspection can be particularly useful because some environmental mites are more active on birds after dark.
If the parasites return, don’t automatically repeat the exact same cleaning routine.
Ask:
Did we identify the parasite correctly?
Were all affected birds addressed?
Are parasites hiding in inaccessible areas?
Could new birds have introduced them?
Does the treatment need to be repeated according to its label?
Does the flock need veterinary evaluation?
📝 A Simple Post-Infestation Cleaning Checklist
Save this checklist for your next deep clean:
☐ Move chickens to a safe temporary area
☐ Remove old bedding
☐ Remove manure and loose debris
☐ Take out removable roosts
☐ Inspect cracks and joints
☐ Inspect nest boxes
☐ Clean feeders and waterers
☐ Wash washable surfaces
☐ Scrub corners and structural joints
☐ Address moisture problems
☐ Disinfect when appropriate
☐ Follow all product directions
☐ Allow the coop to dry completely
☐ Add clean bedding
☐ Inspect the chickens
☐ Return the flock
☐ Schedule a follow-up inspection
This turns “clean the chicken coop” into an actual process rather than simply replacing dirty bedding.
🚨 When Cleaning Isn’t Enough
If chickens remain weak, pale, restless, or heavily infested after cleaning and appropriate parasite control, don’t assume you just need to clean harder.
Contact a veterinarian or qualified poultry professional if:
- Multiple birds are affected
- Chickens are losing significant weight
- Birds appear weak or severely pale
- Egg production changes substantially
- Parasites repeatedly return
- You cannot identify the parasite
- Young birds are deteriorating
- A bird is rapidly becoming worse
An external parasite may not be the only health problem affecting the flock.
Final Thoughts 🐔❤️
Cleaning a chicken coop after a mite or lice infestation is more than throwing out old bedding and adding fresh shavings.
The best approach is inspect, remove, wash, dry, repair, monitor, and follow up.
Start by identifying what parasite you’re dealing with. Then decide how much attention the environment requires.
For lice, the chickens themselves are the primary focus because lice generally remain on their hosts.
For environmental mites, the coop can be a much more important part of the problem, especially around roosts, cracks, joints, and nest boxes.
Most importantly, don’t confuse a clean-looking coop with a parasite-free flock.
A good cleaning routine supports parasite control, but successful management usually requires attention to both the birds and the environment.
With regular inspections and sensible biosecurity, you can make parasite problems easier to detect and much harder to let spiral into a recurring flock issue. 🧹🐔🌱