Introduction
Your chicken doesn’t need to be visibly sick to have an external parasite problem.
Mites and lice can live around the feathers and skin, causing irritation, feather damage, restlessness, reduced condition, and sometimes anemia or more serious problems when infestations are heavy.
The tricky part for beginners is that not every chicken scratching has mites or lice. Chickens naturally preen, scratch, dust-bathe, and rearrange their feathers throughout the day.
The good news is that checking for external parasites doesn’t require complicated equipment.
With good lighting, a calm chicken, and a few minutes of careful inspection, you can check the places where mites and lice are most likely to be found. 🪶
🪳 Mites and Lice Are Not the Same
Before checking your flock, it helps to understand the difference.
Lice
Chicken lice are small, wingless insects that live primarily on the bird.
They feed on things such as feather debris, skin scales, and other material around the bird rather than behaving like blood-feeding mosquitoes.
You may see:
- Tiny fast-moving insects
- Lice around the base of feathers
- Clusters of eggs attached to feather shafts
- Damaged or dirty-looking feathers
- Increased preening or scratching
Lice and their eggs can sometimes be easier to find when you carefully separate the feathers.
Mites
Mites are much smaller and some species are difficult to see without close inspection.
Different poultry mites behave differently.
Some remain on the bird, while others spend significant amounts of time in the coop or surrounding environment and feed on chickens mainly at night.
This difference is important.
A chicken can have a parasite problem even when you don’t find obvious insects during a quick daytime inspection.
🔦 Start With the Right Inspection Setup
You don’t need a laboratory to perform a basic flock check.
Gather:
- A bright flashlight
- A clean towel or old cloth
- Gloves if preferred
- A calm, secure place to hold the chicken
- A phone camera for documenting anything unusual
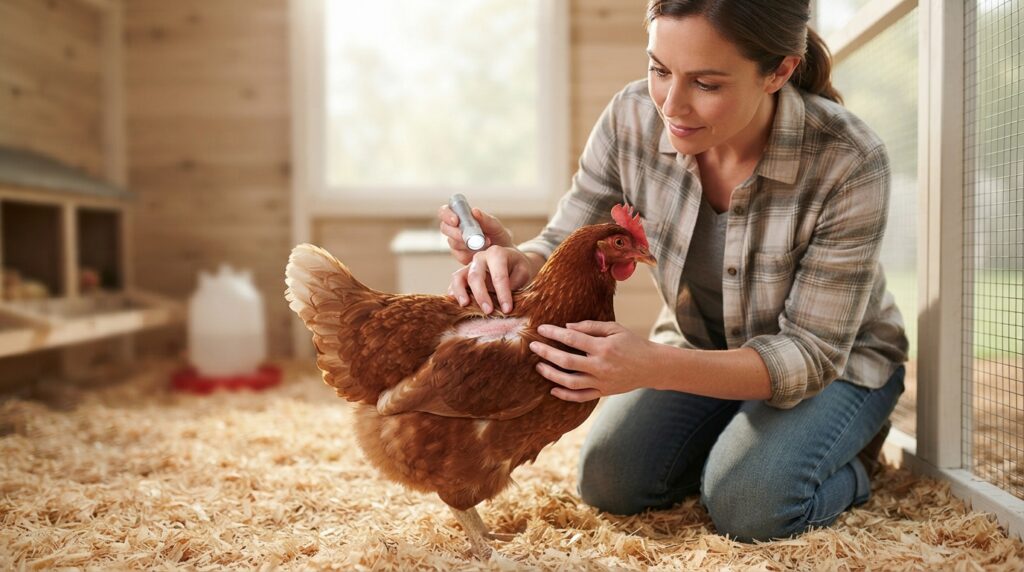
Natural daylight is excellent, but a flashlight can help illuminate the skin underneath dense feathers.
Try to inspect the chicken when it is calm.
A frightened bird will struggle, making it harder to examine the skin safely.
🐔 How to Hold the Chicken Safely
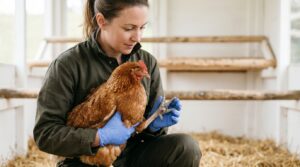
Pick the chicken up calmly and support its body.
Keep the wings controlled without squeezing the chest.
This matters because chickens need normal movement of the chest and body for breathing.
You don’t need to completely restrain the bird for a routine parasite check.
Instead, work systematically through the feathers.
If the chicken becomes extremely stressed, pause and allow it to settle.
🔍 Where Should You Look?
Don’t simply look at the chicken’s back.
Parasites can be easier to spot in areas where feathers are thinner, skin is warmer, or feathers are densely packed.
Check these areas carefully:
1. Around the Vent
This is one of the most useful places to inspect.
Gently part the feathers around the vent and look closely at the skin and feather bases.
Look for:
- Small moving insects
- Clusters of eggs
- Irritated skin
- Excessive dirt
- Feather damage
- Crusts or abnormal debris
Be gentle.
The skin around the vent can be sensitive and easily irritated.
2. Under the Wings
Lift one wing and examine the skin underneath.
Look for:
- Small insects
- Irritated or reddened skin
- Broken feathers
- Excessive scratching
- Unusual debris around feather bases
Repeat on the other side.
Don’t assume that finding nothing under one wing means the chicken is parasite-free.
3. Around the Breast and Abdomen
Part the feathers and look directly at the skin.
You’re looking for movement, eggs, irritation, and abnormal feather condition.
Dense feathers can hide small parasites, so don’t rush this part.
4. Around the Neck
Separate the feathers around the neck and inspect the feather shafts and skin.
Some parasites can be found around feather bases in this area.
5. Around the Tail
Inspect the feathers around the base of the tail.
Look closely at feather shafts and the skin underneath.
A heavily preening chicken may also have damaged feathers that deserve a closer look.
🥚 Look for Lice Eggs
One useful clue is finding clusters of eggs attached to feather shafts.
Lice eggs are often attached to the feathers rather than simply scattered through the bedding.
They may appear as tiny pale or whitish structures grouped near the base of feathers.
However, don’t assume that every white speck is a lice egg.
Dust, skin flakes, dried material, and other debris can look similar.
The location, appearance, and presence of actual moving insects are important when interpreting what you see.
🕷️ Don’t Forget the Coop at Night
This is particularly important when checking for certain mites.
Some poultry mites spend much of their time hiding in cracks, crevices, nest boxes, roost areas, or other parts of the housing and emerge to feed on birds.
That means a daytime chicken inspection may not tell the whole story.
If you suspect mites, inspect the coop too.
Use a flashlight after dark and examine:
- Roosts
- Roost supports
- Cracks in wood
- Nest boxes
- Corners
- Crevices
- Areas around perches
You may find tiny moving specks that are difficult to notice during the day.
🩸 Watch for Signs of a Heavy Infestation
You should pay closer attention when parasite concerns are accompanied by changes in the chicken’s condition.
Possible signs include:
- Excessive scratching
- Frequent preening
- Restlessness
- Feather damage
- Reduced activity
- Pale comb or wattles
- Poor body condition
- Reduced egg production
- Weight loss
- Skin irritation
A heavy parasite burden can be particularly concerning in young, weak, or otherwise compromised birds.
A pale comb can have many causes, however, so it should not automatically be interpreted as proof of mites.
📸 Take Photos When You Find Something Suspicious
If you find tiny insects, eggs, unusual crusting, or damaged feathers, take a close photograph.
Use good lighting and place a familiar object beside the finding for scale if appropriate.
Photos can help you:
- Compare changes over time
- Show a veterinarian
- Document which bird was affected
- Compare findings between chickens
- Remember exactly what you saw
If the suspected parasite is extremely small, collecting a specimen for professional identification may be more useful than relying on a blurry photograph.
🧼 Check More Than One Chicken
Finding parasites on one bird doesn’t necessarily mean only that bird is affected.
Chickens live closely together, share roosts, and interact with the same environment.
If one chicken has a suspected infestation, inspect the rest of the flock.
Pay particular attention to:
- Young birds
- Birds with damaged feathers
- Birds that appear unusually restless
- Birds losing weight
- Birds spending more time alone
A flock-wide inspection gives you a much better picture than checking only the bird that first attracted your attention.
⚠️ Don’t Diagnose Every Scratch as Parasites
This is one of the most important beginner lessons.
Chickens naturally scratch and preen.
Other problems can also cause feather loss or irritated skin, including:
- Feather pecking
- Aggressive behavior
- Molting
- Skin injuries
- Nutritional problems
- Environmental irritation
- Other diseases
If you see substantial feather loss, skin lesions, weight loss, or persistent abnormal behavior but cannot find parasites, investigate other possible causes.
🧪 Why Identification Matters Before Treatment
Not every external parasite should be managed in exactly the same way.
Some parasites spend most of their lives on the bird.
Others spend considerable time in the environment.
That difference affects control.
If you immediately apply an insecticide without identifying the problem, you may treat the wrong parasite, fail to address the environment, or expose chickens unnecessarily to a chemical.
Identification should come before treatment whenever possible.
And always use only products specifically labeled for the birds and situation involved, following the product directions.
🧹 The Coop Is Part of the Investigation
If you suspect mites, don’t stop after examining the chicken.
Inspect the housing.
Look at the areas where parasites can hide:
Roost → cracks → nest boxes → corners → bedding → wall joints
Cleaning and environmental management can be an important part of parasite control, depending on the parasite involved.
Simply treating the bird may not solve a problem when the environment is serving as a reservoir.
🗓️ Make Parasite Checks Part of Your Routine
You don’t need to perform a full inspection every day.
Instead, combine routine observation with occasional hands-on checks.
For example, you might perform a closer inspection when:
- Introducing new birds
- A chicken starts scratching excessively
- Feather condition changes
- Egg production unexpectedly drops
- A bird loses weight
- You notice unusual insects around the coop
- A previously affected flock member develops symptoms again
A quick inspection performed regularly is much easier than discovering a severe problem after weeks of unnoticed symptoms.
🐣 Extra Care for Young Chickens
Young birds deserve particularly careful monitoring.
They have less body reserve than mature birds, and problems that appear relatively minor in an adult can become more significant in a small or growing bird.
During routine handling, check:
- Feather condition
- Skin
- Vent area
- Body condition
- Activity level
- Appetite
- Droppings
Early observation can help you notice changes before they become obvious emergencies.
🚨 When to Get Veterinary Help
Contact a veterinarian or qualified poultry professional when:
- The chicken is becoming very weak
- There is significant weight loss
- The bird appears severely pale
- Skin lesions are extensive
- Multiple chickens are becoming ill
- You cannot identify what you are seeing
- Parasites keep returning despite appropriate control measures
- A young or fragile bird is deteriorating quickly
External parasites can sometimes occur alongside other health problems.
Don’t assume that finding a few insects explains every symptom.
📝 A Simple 5-Minute Chicken Parasite Check
For beginners, save this checklist:
☐ Pick up the chicken calmly
☐ Check around the vent
☐ Look under both wings
☐ Part feathers around the neck and abdomen
☐ Inspect the tail area
☐ Look for moving insects
☐ Look for clusters attached to feather shafts
☐ Check for irritated or damaged skin
☐ Examine the chicken’s overall condition
☐ If mites are suspected, inspect the coop and roosts
☐ Photograph anything unusual
☐ Check the rest of the flock
This simple routine can turn parasite checking from a stressful guessing game into a repeatable flock-care habit. 🔎🐔
Final Thoughts 🌱
Checking chickens for mites and lice doesn’t have to be complicated.
The key is knowing where to look and what you’re actually looking for.
Start with the bird, especially around the vent, under the wings, and around feather bases. Then consider the environment, particularly when you suspect mites that can hide in the coop.
Most importantly, don’t jump from “my chicken is scratching” directly to “my chicken has parasites.”
Observe first. Inspect carefully. Identify the problem when possible. Then choose an appropriate response.
That approach saves time, reduces unnecessary treatment, and helps you become a more confident backyard chicken keeper. 🐔❤️