New chicken keepers can easily come away from coop-cleaning advice believing that every feather, dropping, and piece of dusty bedding represents poor husbandry, yet chickens naturally scratch dirt, shed feathers and dander, spill bedding, and produce plenty of manure. 🐔 A healthy coop therefore does not have to look spotless every morning, and trying to maintain indoor-house levels of cleanliness can create unnecessary work without necessarily improving the flock’s living conditions. A better question is not “Is my coop perfectly clean?” but “Is anything in this coop becoming wet, contaminated, irritating, or difficult for the chickens to use?”
For most backyard flocks, clean enough means dry bedding, reasonably fresh air, clean drinking water, usable nesting areas, controlled manure buildup, and no obvious pest or sanitation problem. That standard can require very different routines depending on flock size, coop design, bedding depth, ventilation, weather, and whether the keeper lives somewhere dry or somewhere hot and humid. 🌦️ Instead of copying another keeper’s exact cleaning schedule, beginners should learn to recognize the conditions that tell them when cleaning is actually necessary.
Chickens Are Messy—That Doesn’t Mean Anything Goes
Chicken housing naturally develops some dust, loose feathers, scratched bedding, and scattered droppings because those are normal results of keeping birds rather than proof that the coop has been neglected. Chickens also defecate repeatedly while sleeping, which is why the area beneath popular roosts can become dirty much faster than quiet corners of the coop. Trying to eliminate every visible sign of chicken activity can turn coop care into an exhausting routine that provides little additional benefit.
However, accepting normal messiness should never become an excuse for allowing persistent moisture, contaminated water, heavy manure accumulation, spoiled bedding, severe pest activity, or strong ammonia-like odors. ⚠️ These conditions matter because moisture and decomposing manure can worsen air quality, encourage flies and microorganisms, and make litter increasingly unpleasant for both chickens and their keeper. The goal is therefore controlled mess rather than perfect cleanliness or complete neglect.
What You Should Observe First: Dryness, Smell, Water, And Bedding
Before judging a coop by appearance, check whether the floor and bedding are mostly dry, especially around drinkers, entrances, and places where rain can enter. Dry litter is easier to manage because droppings lose moisture rather than remaining wet and rapidly decomposing, while persistent dampness usually signals a problem with leaks, ventilation, drinker placement, overcrowding, or bedding management. 💧 A coop that looks somewhat dusty but remains dry may be easier to maintain than a visually tidy coop with hidden damp litter underneath.
Next, use your senses and watch the flock: the coop should not hit you with a powerful ammonia-like smell when you enter, water should look drinkable rather than muddy or manure-filled, and bedding should not feel wet and compacted throughout. Chickens should be able to walk, roost, drink, and use nest boxes without constantly contacting soggy manure or heavily contaminated surfaces. Think of these observations as your real cleaning schedule, because they reveal when conditions are changing before a calendar does.
What Actually Needs Frequent Attention
Some parts of a chicken setup deserve much more attention than cosmetic dirt on walls or harmless dust sitting in an unused corner. The highest-priority areas are places where contamination can directly affect drinking water, eggs, air quality, or the amount of moisture inside the coop. 🔎 Checking these small areas frequently can prevent a five-minute problem from eventually becoming a major cleanout.
This also means you do not necessarily have to strip every inch of bedding whenever one small section becomes dirty. Spot-cleaning wet areas, scraping concentrated manure, replacing nest material, or washing a dirty drinker may restore acceptable conditions without rebuilding the entire bedding system. Efficient poultry care is often about fixing the problem area first rather than treating every mess as an emergency.
Drinking Water
Chicken water does not need laboratory-level sterility, but birds should have regular access to fresh, usable water that is not heavily contaminated with droppings, algae, bedding, or decomposing debris. Chickens can quickly scratch litter into low drinkers or perch over poorly positioned containers, so checking water daily is more useful than assuming a large container will remain clean because it was filled yesterday. 🚰 Raising or repositioning a drinker appropriately can sometimes reduce cleaning work more effectively than repeatedly washing a badly placed container.
Empty and clean a waterer whenever the water becomes visibly dirty, slimy, foul-smelling, or contaminated, and pay closer attention during hot weather when birds drink more. Water containers can also develop biofilm and mineral deposits over time, so periodic scrubbing remains useful even when the water initially appears clear. Clean water is one area where “the chickens don’t mind dirt” is not a good management rule.
Wet Bedding
A small dropping on dry litter is very different from a continually wet patch that never gets a chance to dry. Wet bedding can develop beneath leaking drinkers, around poorly protected doors, under roof leaks, or in humid coops with inadequate airflow, and repeatedly adding fresh bedding on top may simply hide the moisture. 🌧️ When you find persistent wet litter, remove the saturated material and correct the source of the moisture rather than covering it indefinitely.
The amount of litter that needs replacing depends on how localized the problem is, because an otherwise dry floor does not always require a complete bedding change. Deep-bedding systems can work only when the material remains appropriately managed and reasonably dry; they are not permission to allow soggy manure to accumulate without observation. Your priority should always be dryness plus ventilation, not achieving a particular bedding depth or cleaning date.
Nesting Boxes
Nest boxes deserve attention because hens repeatedly use them where you want eggs to remain relatively clean and unbroken. 🥚 A few feathers or pieces of bedding are perfectly normal, but wet manure, crushed eggs, parasites, or badly soiled nesting material should be addressed promptly. Removing obvious droppings and refreshing dirty nesting material is usually more useful than disinfecting the entire nest box every day.
Good nest management also reduces how often eggs require heavy cleaning after collection. Enough dry nesting material, correctly positioned boxes, and discouraging hens from sleeping in nests can make sanitation easier because roosting birds produce significant manure overnight. In other words, coop design and chicken behavior can reduce cleaning work before cleaning even begins.
Heavy Manure Buildup Beneath Roosts
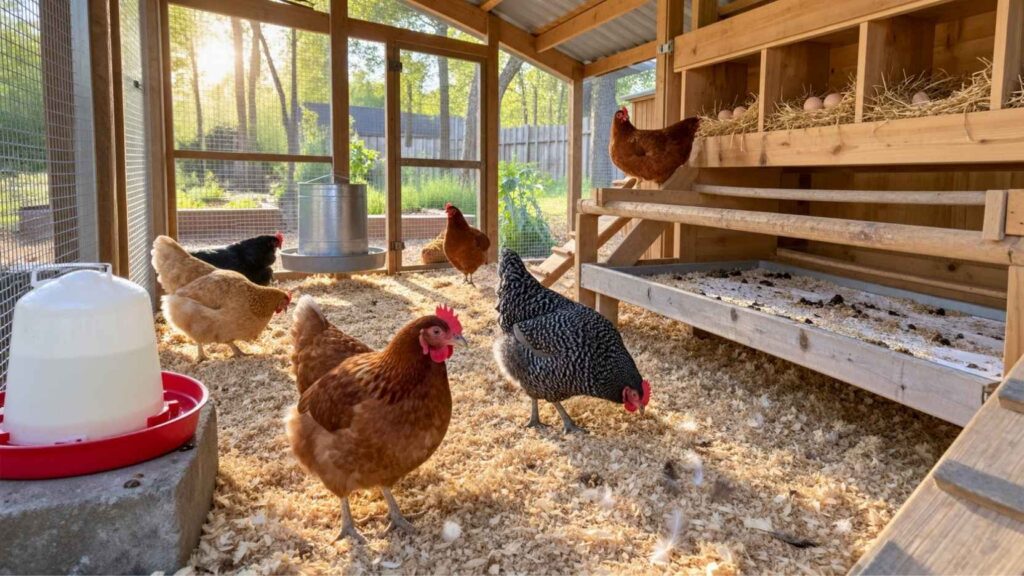
The space under roosts often becomes the dirtiest part of the chicken coop because birds spend several consecutive hours there each night. A dropping board, removable tray, or easily scraped surface beneath the roost can concentrate manure in one manageable location rather than allowing it to mix through all the bedding. 🧹 Removing these concentrated deposits periodically can improve litter condition without requiring constant full-coop cleanouts.
How frequently this area needs attention depends heavily on bird numbers and available floor space, so five hens in a large coop cannot be managed exactly like twenty hens in a compact one. If manure is building into thick, damp deposits or contributing noticeably to odor, flies, or poor air quality, cleaning frequency should increase. Let actual accumulation determine the schedule rather than following somebody else’s arbitrary once-a-week rule.
What Doesn’t Have To Look Instagram-Clean
A working chicken coop may contain dusty beams, scattered feathers, scratched bedding, dried droppings in low-priority areas, and surfaces that would never qualify as clean inside a human home. That does not automatically make the coop unhealthy, because poultry housing is an agricultural environment designed around birds rather than a living room. 📸 Cleaning every harmless stain or loose feather can consume time that would be better spent checking water, ventilation, predators, injuries, or flock behavior.
You also do not need to continuously disinfect every wooden surface unless there is a specific reason to perform deeper sanitation, such as addressing a disease or parasite-management problem. Excessive washing can introduce additional moisture into porous housing, while strong cleaning chemicals must be used carefully around animals and according to their labels. A dry, well-designed, routinely maintained coop is generally a more realistic goal than a coop that temporarily looks brand-new after every cleaning session.
The Green / Yellow / Red Cleanliness Test
🟢 GREEN — Clean Enough: Bedding is mostly dry, ordinary chicken odor is mild, drinking water is usable, nest boxes are reasonably clean, manure buildup is controlled, and chickens are behaving normally. Some dust, feathers, dry droppings, and scratched litter can still be present because green does not mean spotless. When the coop remains in this condition, routine checks and targeted spot cleaning may be all that is required.
🟡 YELLOW — Take Action Soon: Damp patches are appearing, odor is noticeably increasing, flies are becoming more common, water repeatedly becomes dirty, nest bedding is soiled, or droppings beneath roosts are accumulating faster than usual. ⚠️ Yellow conditions usually mean something should be adjusted before it becomes a bigger problem, whether that means adding ventilation, correcting a leak, cleaning the drinker, removing manure, or replacing wet litter. Treat yellow as your maintenance signal rather than waiting until conditions become obviously unpleasant.
🔴 RED — Clean And Investigate The Cause: Persistent wet bedding, a strong ammonia-like smell, severely contaminated water, major manure accumulation, extensive pest problems, moldy or decomposing material, or birds forced to live on saturated surfaces indicate that normal maintenance has fallen behind. These conditions should trigger more than cosmetic cleaning because the keeper also needs to determine why the coop became difficult to manage. Simply replacing dirty bedding without fixing the leaking drinker, overcrowding, roof problem, poor drainage, or inadequate ventilation means the red condition will probably return.
The advantage of this traffic-light system is that it replaces anxiety with observable criteria. A beginner no longer needs to wonder whether a few feathers mean failure or whether an online cleaning schedule applies perfectly to their own flock. Instead, the question becomes simple: Is the coop green, moving toward yellow, or already red?
When To Clean More Often
Hot, humid, or rainy conditions may require more frequent cleaning because bedding can stay damp longer and flies may multiply more readily around moist organic material. ☀️🌧️ Larger flocks, small coops, poorly ventilated buildings, frequent water spills, muddy runs, and hens that sleep inside nest boxes can also increase the maintenance workload. This explains why two responsible chicken keepers can honestly describe very different cleaning schedules without either one necessarily being wrong.
Seasonal changes matter too, because a system that remains dry and easy to maintain during cool weather may behave completely differently during a wet summer. Rather than committing forever to “weekly,” “monthly,” or “twice-yearly” cleaning, adjust the frequency when your green-yellow-red observations start changing. Good chicken keeping is responsive management, not loyalty to a calendar.
When To Worry About The Chickens Rather Than The Coop
Sometimes a dirty-looking coop attracts attention while the more important warning is actually coming from the birds themselves. Chickens that suddenly appear lethargic, stop eating or drinking normally, develop significant breathing difficulty, suffer persistent diarrhea, show unusual neurological signs, or experience unexplained illness or deaths need closer attention than another round of cosmetic sweeping. 🩺 Cleaning may still be useful, but environmental tidiness should never replace investigating a flock health problem.
Likewise, parasites, respiratory problems, injuries, and infectious diseases cannot always be solved by making the coop look cleaner. Observe the birds during your daily routine because their behavior, appetite, posture, breathing, feathers, droppings, and social activity can reveal problems that photographs of a tidy coop cannot. When illness is suspected or multiple birds are affected, appropriate poultry-veterinary guidance may be more important than simply increasing cleaning frequency.
The Beginner Rule: Aim For Functional, Not Spotless
The easiest way to avoid both extremes is to stop measuring chicken cleanliness by human-house standards. Your coop does not need to smell like disinfectant or look ready for a social-media photo, but it should provide dry footing, breathable air, accessible clean water, usable nest boxes, manageable manure, and an environment the flock can comfortably use. 🐓 Those outcomes matter more than whether every surface looks freshly scrubbed.
For beginners, remember one simple rule: clean what affects function, health, moisture, air quality, water, eggs, or pest control first, and worry about cosmetic mess second. A few feathers and dusty corners are ordinary chicken life; persistent wetness, powerful ammonia-like odor, contaminated water, major pest activity, or heavy manure buildup are signals to act. Once you learn that distinction, coop cleaning becomes less about chasing perfection and more about maintaining a practical environment that works for both you and your chickens.